A pin can be tiny, but the right backing makes a big difference. This pin backing guide explains how to choose a fastener for your jacket, bag, hat, lanyard, or display board, then attach it so the accessory sits flat and stays easier to monitor. The goal is not to make an absolute promise that a pin can never come loose; movement, thick fabric, snagging, and repeated handling all affect security. Instead, use the backing as part of a simple routine: match the fastener to the item, seat it fully, check it before leaving, and inspect it again after active use.
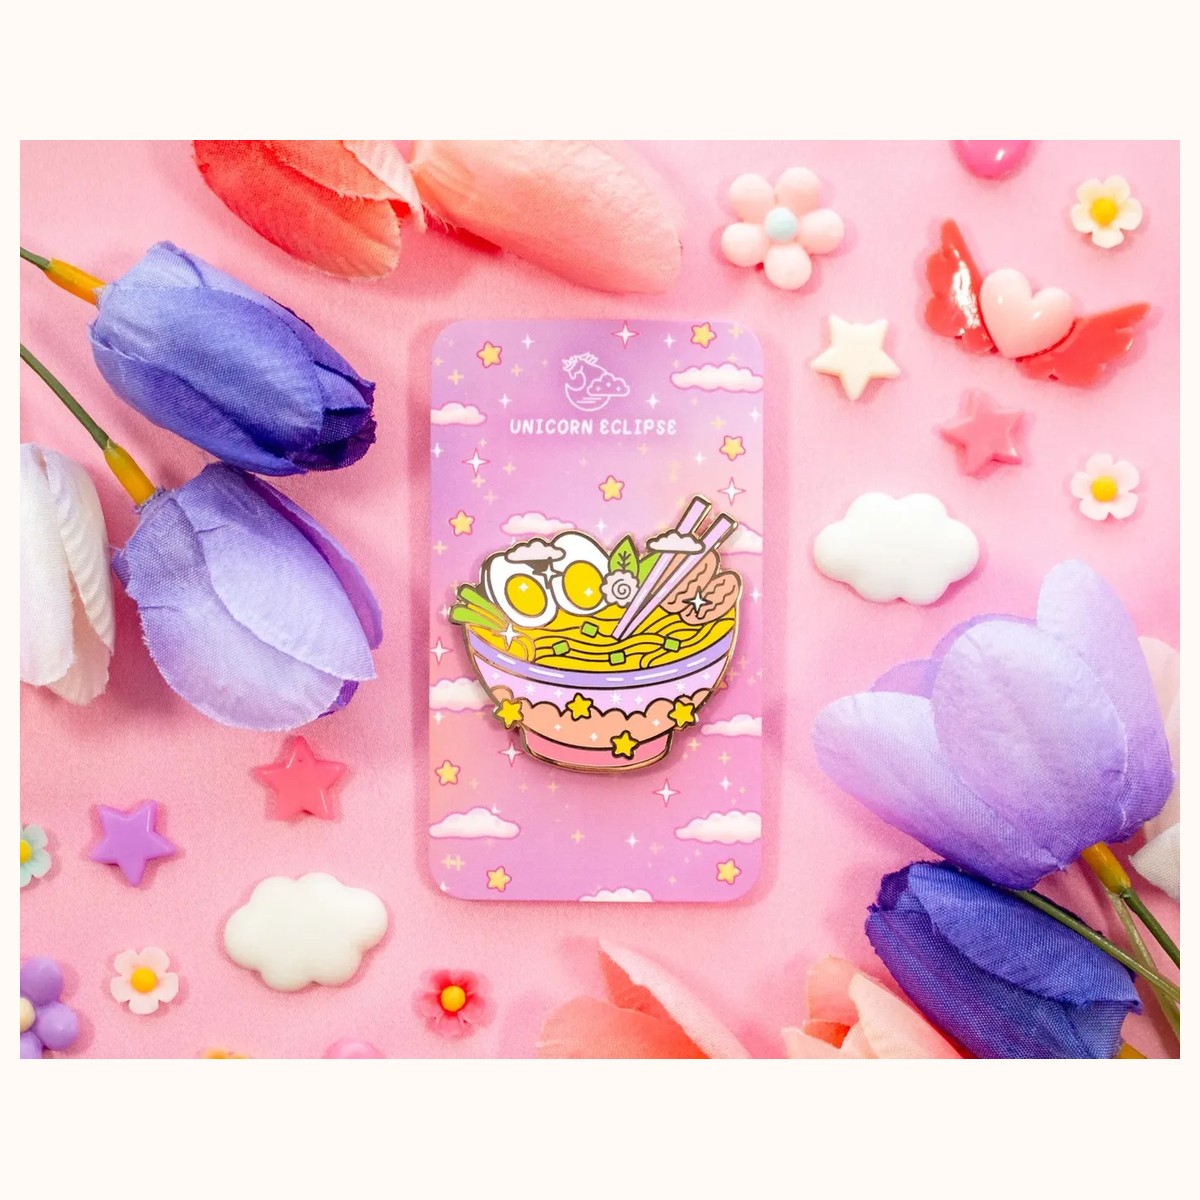
For a real example, the Ramen Bowl Enamel Pin is listed with two rubber clutches. That detail is useful when planning placement: two attachment points can help a larger or wider pin lie more evenly than a single point, provided both clutches are seated correctly. You can browse comparable designs in the Pins & Pinback Buttons collection.
Start with the backing, not just the design
The front of a pin gets most of the attention, but the backing determines how you attach it and how easy it is to remove. Before putting a pin on clothing, turn it over and identify the fastener. If a listing names the backing, use that information; if it does not, inspect the piece rather than guessing.
Common backing choices
- Rubber clutch: A small rubber piece presses onto the pin post. It is quick to attach and remove, making it convenient for accessories you rotate between outfits. Push it straight onto the post instead of twisting it sideways. If the clutch feels loose before it reaches the base, set it aside and check whether it is worn or mismatched.
- Butterfly clutch: This style usually has two side tabs that you squeeze while sliding it onto the post. It can be easy to handle, but the tabs may catch on a lining or pocket if the back is left exposed. Press the clutch down until it is snug, then check the post from the side.
- Locking or screw-style backing: These fasteners are designed for people who want an additional step between the pin and removal. They can be useful on a frequently carried bag or a display that gets moved. Tighten only until secure; excessive force can make removal difficult or put stress on the pin.
- Magnetic backing: A magnet may suit a non-puncturing display surface, but it is a different solution from a post-and-clutch pin. Confirm that the surface and the item are compatible, and do not assume a magnetic backing is suitable for clothing or for carrying weight.
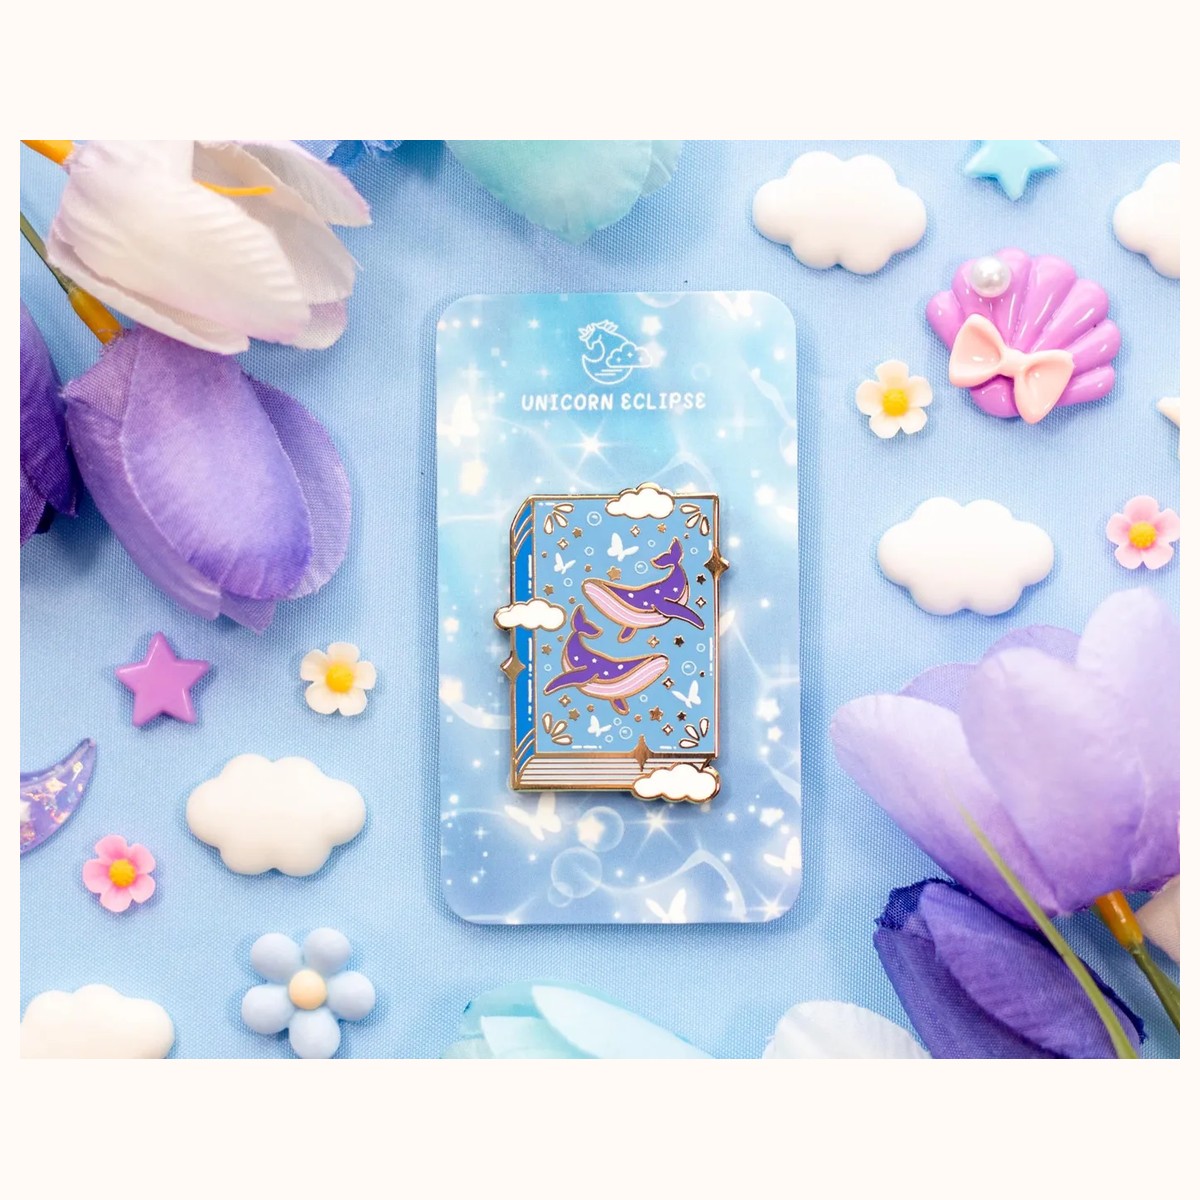
A catalog description may provide helpful specifics without answering every use question. For example, the Whale Book Enamel Pin is described as measuring approximately 1.25 x 1.75 inches and fastening with two rubber clutches. That tells you what to expect at the back, while your choice of jacket, bag, or pin board still determines the best placement and inspection routine.
If you are comparing products, note the backing type, number of posts, approximate size, and intended surface. When a product page leaves a detail unclear, check the About page or contact the store before ordering if that detail affects your decision.
Match the fastener to the item you will wear
A backing that feels fine on a light denim jacket may behave differently on a soft knit, a lined tote, or a canvas backpack. Start by considering movement and thickness rather than choosing only by appearance.
For jackets and lapels, choose a flat area with enough fabric for the post to pass through without landing on a seam, pocket edge, or folded hem. Put the pin through from the outside, then support the front with one hand while pressing the backing on from behind. On a thin lapel, avoid pulling the front sideways as you fasten it; that can enlarge the puncture point and leave the pin sitting at an angle.
For backpacks and canvas bags, look for a stable panel rather than a flexible flap. A bag is lifted, set down, and rubbed against other surfaces, so inspect the backing after commuting or travel. If the bag has an interior lining, make sure the post passes cleanly through the chosen panel and does not snag the lining, zipper tape, or contents. A locking-style fastener may be worth considering for a pin you rarely remove, while a rubber clutch can be practical for a design you change often.
For hats, avoid placing a pin where the crown bends sharply or where the post could press against your head. A side panel or structured area is usually easier to check. Keep the number of pins modest enough that they do not pull the fabric out of shape. If the hat is washed, remove the pin first unless the care instructions specifically say otherwise.
For lanyards and thin straps, check both sides before attaching. A narrow strap may not provide enough room for a larger pin to sit flat, and movement around the neck or clasp can increase snagging. Place the pin away from the strap edge and keep the backing accessible for inspection. Do not use a decorative pin as a substitute for a purpose-built badge or ID attachment when the item has a safety or work-related function.
For cork boards or display fabric, you can prioritize arrangement and easy rearrangement, but the board still needs a stable surface. Press the pin in straight, keep the backing from being crushed against a wall, and store loose backings in a small labeled container. Displaying the Sakura Enamel Pin, listed with two rubber clutches and an approximate 1.5 x 1.5-inch size, gives you a useful example of a compact design that can be arranged with other small pieces while leaving room to check each fastener.
Attach a pin securely in five steps
A careful attachment takes less time than searching for a lost accessory. Use this sequence whenever you move a pin to a new surface.
1. Choose and test the location. Look for clean, dry fabric or a stable board surface. Hold the pin in place and check that the design will not be hidden by a fold, pocket, strap, or seam. 2. Check the post and clutch. Make sure the post is straight and the clutch is not visibly cracked, stretched, or filled with lint. If the backing is already loose in your fingers, replace it or choose a more suitable fastener before attaching the pin. 3. Pierce once and keep the front steady. Push the post through the fabric in a straight motion. Avoid wiggling it around to create a larger hole. For thicker material, move slowly and use a location where the post can pass through without meeting a hard seam. 4. Press the backing fully into place. Keep the pin face flat while you push the clutch onto the post. With two-post designs, attach both backings and compare the front and side views; the pin should not rock noticeably from one end to the other. 5. Perform a gentle check. Hold the fabric near the pin and give the pin a light, controlled wiggle. This is not a strength test. You are checking whether the backing is seated and whether the pin tilts, catches, or pulls the fabric. If it shifts, remove it and start again rather than tightening harder immediately.
When removing a rubber clutch, pull it straight back while supporting the pin face. If it is difficult to grip, use a clean cloth for traction instead of squeezing the enamel or levering against the fabric with a sharp object. Store the pin and backing together in a small pouch, card, or compartment so the matching fastener does not disappear.
Troubleshoot looseness, snags, and wear
The pin rotates or droops. First check whether all posts are through the same layer of fabric and whether every clutch is fully seated. A thick seam or uneven fold can hold one side higher than the other. Move the pin to a flatter area. If the design is wide and has two posts, use both rather than leaving one unused.
The clutch keeps sliding off. Remove the pin and inspect the clutch for stretching, cracks, debris, or a poor fit. Try a fresh compatible backing instead of repeatedly pushing the same loose piece back on. If the item will be exposed to constant movement, consider a locking fastener and test it on a less visible area first.
The fabric is pulling or showing a large hole. The placement may be too close to an edge, seam, or unsupported fold, or the pin may be too heavy for that material. Move it to a stronger panel, reduce the number of pins in that area, or use the piece on a display board instead. Never force a post through a woven section that resists it; that can cause more damage than the accessory is worth.
The pin snags on clothing or a bag lining. Turn the item inside out and identify what catches: an exposed post, a clutch edge, a loose thread, or a zipper. Re-seat the backing, trim only a stray thread with appropriate care, or move the pin away from the opening. Do not cover the backing with adhesive as a quick fix unless you are comfortable with residue and possible fabric damage.
You cannot find a backing. Keep using the pin off the item until you have a compatible replacement. Search the storage pouch, pin board, bag pocket, and laundry area, but do not substitute random small parts that do not fit the post. If you need confirmation about a replacement or product detail, use the store’s contact page.
Finally, make a quick habit of checking small accessories before laundry, packing, lending, or travel. Remove pins before washing or dry cleaning unless the garment-care and product guidance clearly support leaving them in place. Wipe visible dust with a soft, dry cloth, keep pins away from loose keys and sharp objects, and store them dry with their backings attached. Secure placement is a combination of the right fastener, a sensible surface, and a few seconds of attention each time you wear or display the piece.
Related reading: How to Build a Personalized Gift Bundle · 10 Best Creative Keychains for Thoughtful Gifts · Why Small Gifts Create Big Connections