A birthday table can fill quickly with wrapped presents, cards, bags, and last-minute additions. Gift label organization turns that busy moment into a manageable system: every package gets a clear recipient, an occasion cue, and a place in the handoff order. Whether you are preparing one present or a whole family celebration, a few deliberate choices can prevent the classic problems—unreadable names, duplicate gifts, and labels that fall off before the party begins.
This guide focuses on a practical paper-based setup. You can adapt it for birthday parties, graduations, baby celebrations, holidays, housewarmings, or any gathering where several gifts need to stay identifiable.
Start with a label plan before you wrap
The most useful label is not necessarily the most decorative one. Begin by deciding what information must remain visible from the moment you finish wrapping until the recipient opens the gift.
Make a quick master list before opening your wrapping supplies. Write each recipient on one line, then add the gift description in a few words and its intended location. For example:
- Maya — sketchbook — birthday table
- Uncle Sam — coffee set — family dinner
- Lina — two-part bundle, 1 of 2 — keep together
The list is your control document; the physical label is the quick visual check. If a gift is going into a bag, attach or place the label where it can be seen without unpacking. If the wrapping has a busy pattern, choose a quiet label area or add a plain backing strip first so the handwriting has contrast.
Next, decide on a small code that can be read at a glance. One option is a color cue for each recipient. Another is a tiny symbol—star for the birthday person, balloon for a child, house for a housewarming gift. Keep the code simple enough that another helper can understand it. If color is important, pair it with the written name or symbol; color alone is less reliable in dim rooms and can be difficult for some guests to distinguish.
For several gifts, number the packages in opening order: “1 of 3,” “2 of 3,” and “3 of 3.” Numbering is especially helpful when a present is split across multiple bags or when siblings have similar wrapping. Write the same number in your master list. If the order changes, cross out the old number and rewrite it rather than relying on memory.
Build a sorting station that prevents mix-ups
Gift label organization works best when labeling is a separate step, not something squeezed between cutting tape and tying ribbon. Create three small zones on a table or desk:
1. Unlabeled gifts: items still waiting for a final check. 2. Labeling supplies: labels, a pen, optional decorative stickers, tape, and your master list. 3. Ready gifts: packages whose names and details have been verified.
Process one recipient at a time. Pull that person’s gifts together, check them against the list, write every label, and move the finished group to the ready zone. This is safer than wrapping all gifts first and labeling everything in a pile, especially when several packages use the same paper.
For a quick visual audit, position finished gifts with the name facing upward. Then count by recipient: does Maya have the expected three parcels? Does the “1 of 2” package have a matching “2 of 2”?
A compact label kit can include a small writing pad for temporary notes. For example, the Writer Aesthetic Cute Sticky Note Memo Pad has 3 in x 3 in sheets with adhesive backing, making it suitable for a provisional name, table location, or packing reminder. Use a temporary note on a storage box or gift bag while sorting, then replace it with the final label. Do not treat a temporary note as the only label if it may be moved or removed before the celebration.
If you are labeling gifts days in advance, separate “prepared” from “ready to display.” Prepared means the name has been written and checked. Ready to display means the package has also passed a final check for loose tape, exposed contents, and matching parts. This two-stage distinction avoids a rushed discovery that a label is hidden under a ribbon or attached to the wrong bag.
Choose labels and decorative cues for the occasion
Match the label style to the surface and the job. A flat paper tag or sticker works well on a box, envelope, or smooth gift bag. A removable decorative tape can frame a handwritten name or mark a bundle without covering the recipient’s details. If you are adding a sticker to a glossy bag, test one in an inconspicuous area first and press the surface clean and dry before applying it.
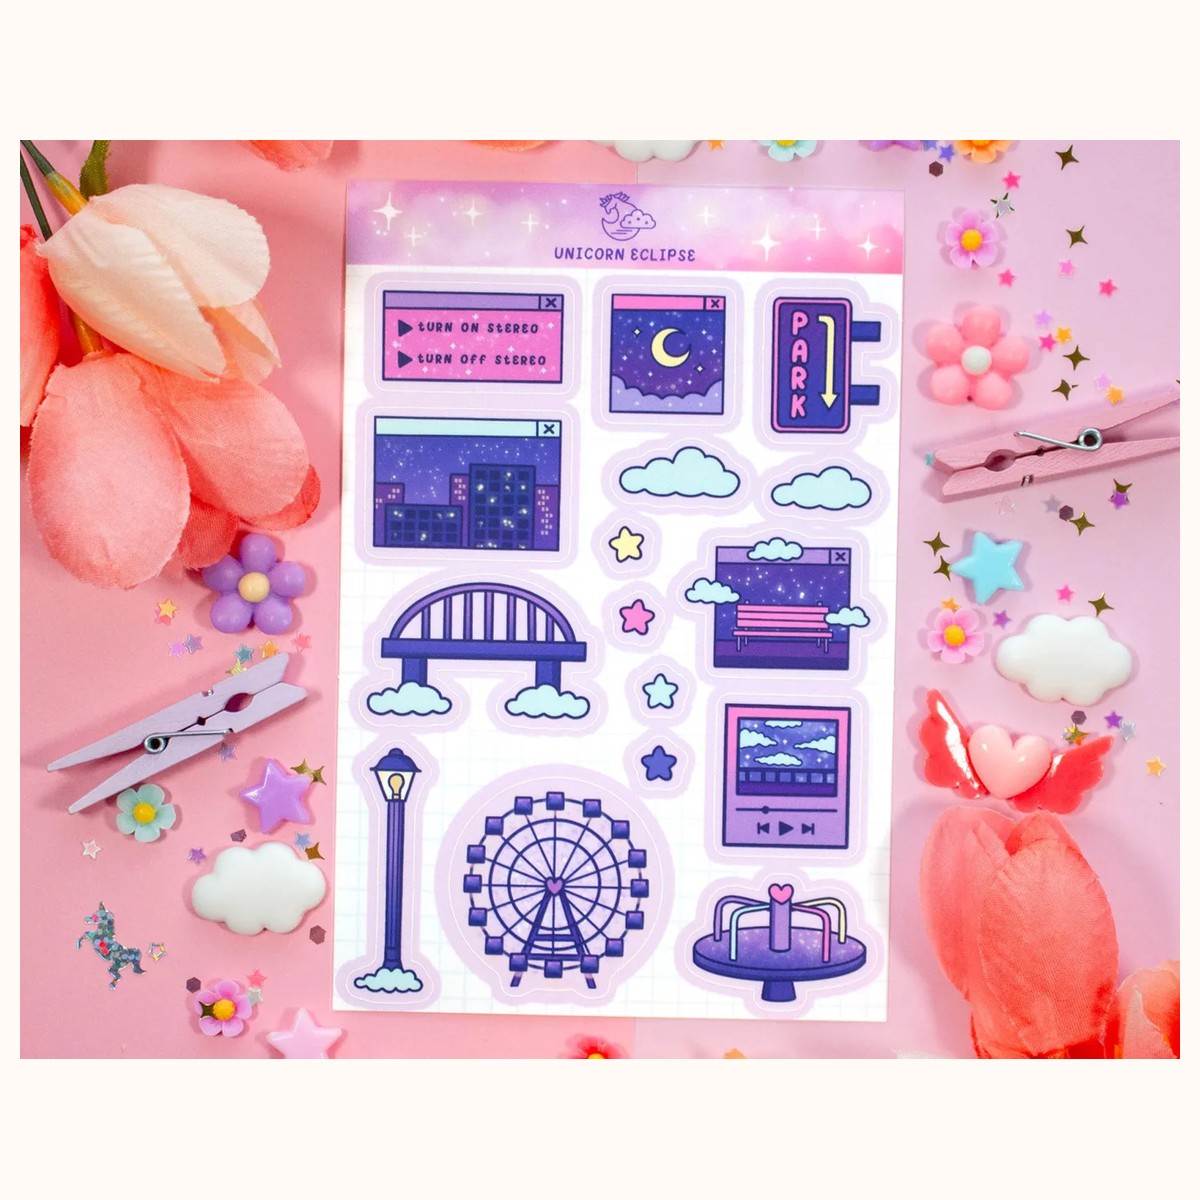
The Stickers, Labels & Tags collection is a practical place to browse designs for this kind of system. For a coordinated evening theme, the City Nights Sticker Sheet contains 16 individual stickers on a 4 in x 6 in sheet. Its compact format can be useful for a small labeling kit: reserve a few stickers for recipient cues, use others to mark the gift table map, and keep the rest for envelopes or thank-you notes. Treat decorative stickers as visual support rather than a replacement for the written name.
You can create an occasion key without making every package identical.
Handwriting decisions matter. Use a pen with a line weight that remains legible on the label, and write names in the same location on every package. If children will help, have them decorate the border after an adult writes the recipient name. If a label has limited space, use the first name plus an initial only when everyone at the gathering will understand it; otherwise write the full identifying name.
For reusable gift bags, avoid permanent marks on the bag itself unless you know the bag is intended for one recipient. Place the name on a removable tag or a separate sticker. For delicate wrapping paper, reinforce a paper tag with a small strip of tape rather than pressing adhesive directly onto a fragile surface. When using decorative washi tape, keep it beside—not over—the recipient’s name so the label remains readable.
Troubleshoot common labeling problems
The label keeps peeling. Check whether the surface is dusty, textured, damp, or coated with loose glitter. Move the label to a clean, flatter area and press from the center outward. For a paper tag, use a secure tie or a small piece of tape on the reverse. If the package will be carried outdoors, place the tag inside a clear bag or attach it under a handle where it is less exposed.
The ink smears or disappears. Allow writing to dry before stacking gifts. Test the pen on a spare label or the edge of the same material. On a dark or patterned package, add a light backing shape so the name has contrast. If handwriting is difficult to read, print the name in block letters and add the decorative details afterward.
Two gifts have nearly identical labels. Add a short descriptor, such as “red scarf” or “book bundle,” to your master list rather than crowding the visible label. Number matching parcels and keep them together in a shallow box or tote. If two people share the same first name, add an initial or relationship only when it is appropriate and clear.
A label is hidden by ribbon or a bow. Before moving a finished gift to the ready zone, rotate it and check all sides. Place the label on the top face or near the handle, not beneath the largest decoration. If the bow must stay centered, attach a second small name cue to the side and keep the master label on the top.
A last-minute gift appears. Do not interrupt the whole system. Write the new item on the master list, assign the next number if needed, label it, and place it at the end of the correct recipient’s group. Then do one final count for that recipient.
A gift is meant for more than one person. Decide whether it should have one shared label or two names. For a shared household gift, write both names on one label and add “shared” to the master list. For a bundle with separate items, label the outside “1 of 2” and “2 of 2,” then make sure both pieces stay in the same ready zone.
Finally, keep a small record of what has already been handed over if the event is crowded. A check mark beside the name is enough. If you need clarification about available products, label details, or ordering information, verify through Farouk Book Store’s contact page rather than guessing from a photo or an incomplete note.
A good label system should make celebration preparation calmer, not more elaborate. Choose a few cues, sort gifts in recipient groups, verify every package, and keep the written name more prominent than the decoration. With that routine, even a crowded birthday table can stay clear, personal, and easy to manage.
Related reading: How to Build a Personalized Gift Bundle · Why Handwritten Greeting Cards Still Matter · How to Choose Stickers for Journals and Planners